How to Build a Raised Pond with Railway Sleepers

Creating a pond or water feature from railway sleepers adds a whole other dimension to your garden. Water loving plants fish & frogs, the sound of running water, dreamy reflections etc.
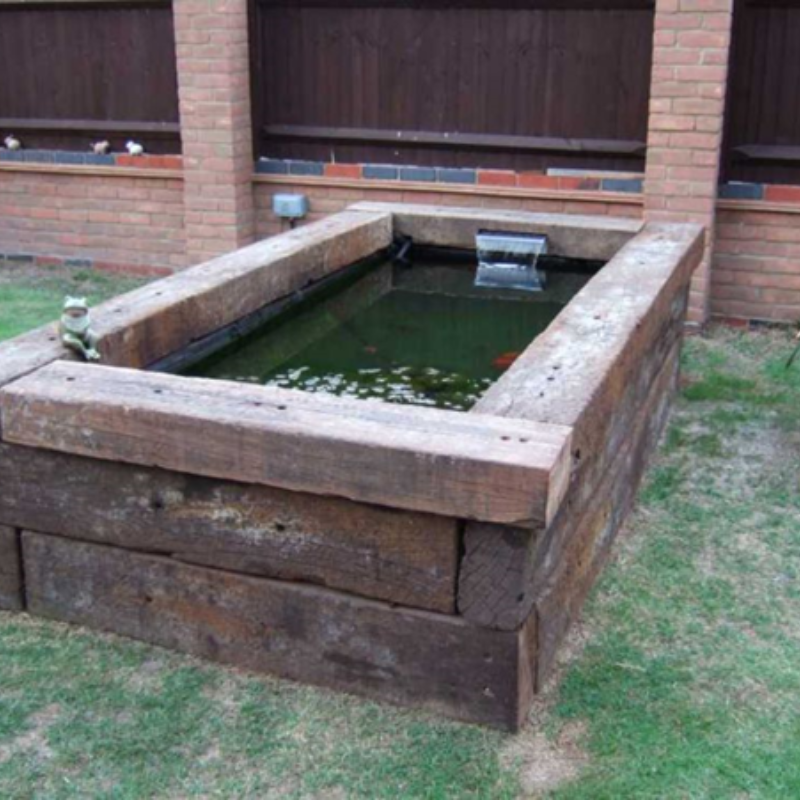
Constructing a raised pond out of railway sleepers is amazingly straightforward. Think lego, or wooden building blocks. Building a pond is very quick and simple, with very few tools needed.
1) Choose where you want to put the raised pond
Consider where the raised pond will be positioned and whether you can stand or sit next to one side of the raised pond, or whether both sides are accessible.

2) Lay the railway sleepers on the ground
Place the railway sleepers on the ground in a square or rectangular shape, with the railway sleepers touching at the 90 degree corners (like creating a big picture frame). The railway sleepers should ideally be laid on a surface that is level and firm.
Many people simply lay them down directly on the earth, grass, deck or concrete. Perfectionists and Engineers will probably consider a foundation of concrete or hardcore, but more mortal people will often go for the simpler, quicker option. As you are building a raised pond, you don't have to think of drainage!

3) Fasten the Railway Sleepers together
Fasten the railway sleepers together with Timberlok sleeper screws. If you have placed the railway sleepers on the ground on their narrow edge, as in the photo above, then simply screw them together at the 90 degree corners, allowing at least 50mm (or 2") of the screw to go into the adjoining sleeper. Two screws per corner is a good solid formula.
If you have placed the railway sleepers on the ground on their wider edge, then again simply screw them together at the 90 degree corners, allowing at least 50mm (or 2") of the screw to go into the adjoining sleeper. You will obviously need to screw through more of the railway sleeper than on the narrow edge option. The one exception is if you are intending to have a second layer.
In this case, you don't have to attach the first layer to itself. Simply place the second layer on top of the first (remembering to overlap the joints) and screw through the second layer into the first layer below. Repeat if you want a third layer. Again, at least two screws per sleeper end is a good solid formula.

4) Stack and fix a second layer (if you want the raised pond to be higher)
If you want a second or a third layer, simply repeat stage 2 & 3, apart from you are placing the second or third layer of railway sleepers on to the already positioned first layer. If you have placed the railway sleepers on the ground on their narrow edge, then simply again screw the second layer together at the 90 degree corners, as above, allowing at least 50mm (or 2") of the screw to go into the adjoining sleeper. Two screws per corner is a good solid formula.
Once you've done that, you will have two or more layers sitting on top of each other, but not attached TO each other. Simply fasten the layers together with a screw that goes through the top layer to the layer below. If you don't want this to be seen, screw at 45 degrees on the inside of the raised pond, through side of the top layer into the layer below. Alternatively you can use a batten or metal strip to fasten the different layers together. The whole structure is now interlocked.

If you are stacking the sleepers horizontally on their broadest side, e.g. on the 250mm width of a 250mm x 125mm sleeper, then all you need to do is to overlap the joints of the sleepers, from layer to layer, like building a brick wall, and fasten each layer to the layer below with timberlok screws or similar. You have now created a structure that is interlocked, and could be picked up in one piece by a crane, if you had the inclination!

5) Attach pond liner
You'll probably want to first put some carpet or material onto the floor of the pond, to cover any stones or sharp edges. Then attach a pond liner to the inside of the railway sleeper box. If the pond liner is then folded over the top railway sleeper you will probably want to put an additional railway sleeper or timber capping on top of it to hold the pond liner in place, and to hide it.
6) Fill with water
Allow time to fill the raised pond with water, and for the liner to slowly expand into the space.

7) Fill with fish and plants
Of course you will need to to add pumps and water filters first, depending on the seriousness of your aquatic adventure! Choose from outdoor coldwater species like goldfish or koi. To browse our range of pond plants click here.

This blog was written by RailwaySleepers.com and used with grateful permission. The original blog can be viewed with additional content via this link click here.

Photo credit(s): Railwaysleepers.com
Please click here to visit Railwaysleepers.com for more information on railway sleepers or to purchase railway sleepers for your garden raised pond project.


